Yamaha YZF-R125 Service Manual: Lubricating the drive chain
The drive chain consists of many interacting parts. If the drive chain is not maintained properly, it will wear out quickly. Therefore, the drive chain should be serviced, especially when the vehicle is used in dusty areas.
This vehicle has a drive chain with small rubber O-rings between each side plate. Steam cleaning, high-pressure washing, certain solvents, and the use of a coarse brush can damage these O-rings. Therefore, use only kerosene to clean the drive chain. Wipe the drive chain dry and thoroughly lubricate it with engine oil or chain lubricant that is suitable for O-ring chains.
Do not use any other lubricants on the drive
chain since they may contain solvents that could
damage the O-rings. 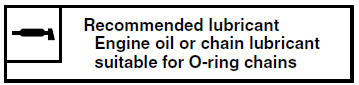
 Adjusting the drive chain slack
NOTE:
The drive chain slack must be checked at the
tightest point on the chain.
CAUTION:A drive chain that is too tight will
overload
the engine and other vital parts, and one that
...
 Checking and adjusting the steering head
1. Stand the vehicle on a level surface
WARNINGSecurely support the vehicle so that there
is
no danger of it falling over.
NOTE:
Place the vehicle on a suitable stand so that the ...
Other materials:
Checking the cooling system
1. Remove:
Side covers
Upper side cowlings
Refer to "GENERAL CHASSIS" on page 4-1.
2. Check:
Radiator "1"
Radiator inlet hose "2"
Radiator outlet hose "3"
Coolant reservoir hose "4"
Water pump breather hose "5"
Cracks/damage → Replace.
Refer to "RADIATOR" on page 6-1 ...
Installing the front brake master cylinder
1. Install:
Brake master cylinder "1"
Brake master cylinder holder "2"
NOTE:
Install the brake master cylinder holder with the
arrow mark "a" pointing forward.
Align the end of the brake master cylinder holder
with the punch mark "b" on the handlebar.
First, tighten the front bo ...
Removing the crankshaft
1. Remove:
Crankshaft "1"
NOTE:
Remove the crankshaft with the crankcase
separating tool "2".
Make sure the crankcase separating tool is
centered over the crankshaft.
CAUTION:
To protect the end of the crankshaft, place
an appropriate sized socket between the
c ...