Yamaha YZF-R125 Service Manual: Checking the spark plug
1. Remove:
- Right side cover Refer to "GENERAL CHASSIS" on page 4-1.
2. Disconnect:
- Spark plug cap
3. Remove:
- Spark plug
| CAUTION: Before removing the spark plug, blow away any dirt accumulated in the spark plug well with compressed air to prevent it from falling into the cylinder. |
4. Check:
Spark plug type
Incorrect →Change.
5. Check:
- Electrode "1" Damage/wear→ Replace the spark plug.
- Insulator "2"
Abnormal color→ Replace the spark plug.
Normal color is medium-to-light tan.
6. Clean:
- Spark plug (with a spark plug cleaner or wire brush)
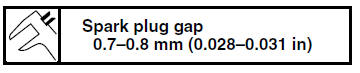
7. Measure:
- Spark plug gap "a"
(with a wire thickness gauge)
Out of specification → Regap.
8. Install:
- Spark plug

NOTE:
Before installing the spark plug, clean the spark plug and gasket surface.
9. Connect:
- Spark plug cap
10.Install:
- Right side cover Refer to "GENERAL CHASSIS" on page 4-1.
 Adjusting the throttle cable free play
NOTE:
Prior to adjusting the throttle cable free play, the
engine idling speed should be adjusted.
1. Check:
Throttle cable free play "a"
Out of specification →Adjust.
2. Remov ...
 Checking the ignition timing
NOTE:
Prior to checking the ignition timing, check the
wiring connections of the entire ignition system.
Make sure all connections are tight and free of
corrosion.
1. Remove:
Rider seat
L ...
Other materials:
Circuit diagram
4. Main fuse
5. Main switch
9. Battery
25.ECU (engine control unit)
36.License plate light
37.Tail/brake light
44.Headlight relay
46.Pass switch
47.Dimmer switch
51.Headlight (low beam)
52.Auxiliary light
54.Headlight (high beam)
58.Meter light
60.High beam indicator light
64.Ignit ...
Checking the primary drive gear
1. Remove:
Primary drive gear
Refer to "BALANCER GEAR" on page 5-53.
2. Check:
Primary drive gear
Damage/wear Replace the
primary drive
gear and clutch housing as a set.
Excessive noise during operation
Replace
the primary drive gear and clutch housing as
a set
...
Checking the valve springs
The following procedure applies to all of the
valve springs.
1. Measure:
Valve spring free length "a"
Out of specification Replace the valve
spring.
2. Measure:
Compressed valve spring force "a"
Out of specification Replace the valve
spring.
b. Installed length
3. ...