Yamaha YZF-R125 Service Manual: Bleeding the hydraulic brake system
| WARNING Bleed the hydraulic brake system whenever:
|
NOTE:
- Be careful not to spill any brake fluid or allow the brake master cylinder reservoir or brake fluid reservoir to overflow.
- When bleeding the hydraulic brake system, make sure there is always enough brake fluid before applying the brake. Ignoring this precaution could allow air to enter the hydraulic brake system, considerably lengthening the bleeding procedure.
- If bleeding is difficult, it may be necessary to let the brake fluid settle for a few hours. Repeat the bleeding procedure when the tiny bubbles in the hose have disappeared.
1. Bleed:
- Hydraulic brake system
a. Fill the brake fluid reservoir to the proper level with the recommended brake fluid.
b. Install the diaphragm (brake master cylinder reservoir or brake fluid reservoir).
c. Connect a clear plastic hose "1" tightly to the bleed screw "2".
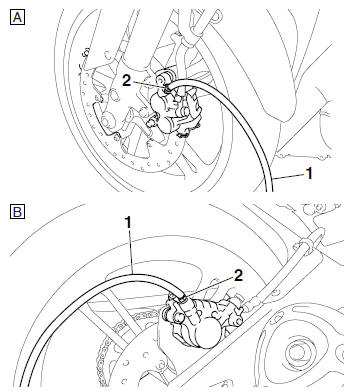
A. Front
B. Rear
d. Place the other end of the hose into a container.
e. Slowly apply the brake several times.
f. Fully pull the brake lever or fully press down the brake pedal and hold it in position.
g. Loosen the bleed screw.
NOTE:
Loosening the bleed screw will release the pressure and cause the brake lever to contact the throttle grip or the brake pedal to fully extend.
h. Tighten the bleed screw and then release the brake lever or brake pedal.
i. Repeat steps (e) to (h) until all of the air bubbles have disappeared from the brake fluid in the plastic hose.
j. Tighten the bleed screw to specification.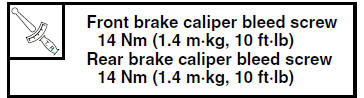
k. Fill the brake fluid reservoir to the proper level with the recommended brake fluid.
Refer to "CHECKING THE BRAKE FLUID LEVEL" on page 3-18.
| WARNING After bleeding the hydraulic brake system, check the brake operation. |
 Checking the rear brake hose
1. Check:
Brake hoses "1"
Cracks/damage/wear
Replace.
2. Check:
Brake hose holder "2"
Loose connection Tighten the
holder bolt.
Loose or open holder Fasten
properly ...
 Adjusting the drive chain slack
NOTE:
The drive chain slack must be checked at the
tightest point on the chain.
CAUTION:A drive chain that is too tight will
overload
the engine and other vital parts, and one that
...
Other materials:
Installing the generator
1. Install:
Woodruff key
Generator rotor
Washer
Generator rotor nut
NOTE:
Clean the tapered portion of the crankshaft and
the generator rotor hub.
When installing the generator rotor, make sure
the woodruff key is properly sealed in the keyway
of the crankshaft.
2. Tighte ...
Installing the thermostat
1. Install:
Thermostat
NOTE:
Install the thermostat with its breather hole "a"
facing up.
2. Install:
Copper washer
Coolant temperature sensor
CAUTION:Use extreme care when handling the
coolant
temperature sensor. Replace any part that
was dropped or subjected to ...
Installing the steering head
1. Lubricate:
Upper bearing
Lower bearing
Bearing races
2. Install:
Lower ring nut
Rubber washer
Upper ring nut
Lock washer
Refer to "CHECKING AND ADJUSTING
THE STEERING HEAD" on page 3-22.
3. Install:
Upper bracket
Steering stem nut
NOTE:
Temporarily tighten t ...