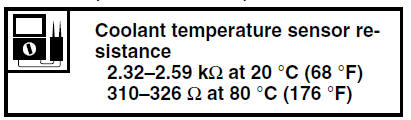
Yamaha YZF-R125 Service Manual: Checking the coolant temperature sensor
1. Remove:
- Coolant temperature sensor
WARNING
|
2. Check:
- Coolant temperature sensor resistance
Out of specification →Replace.
a. Connect the pocket tester (  ×
×
100) to the
coolant temperature sensor terminals as
shown.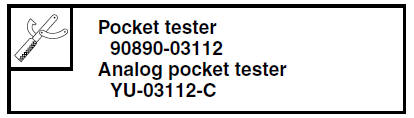
- b. Immerse the coolant temperature sensor "1" in a container filled with coolant "2".
NOTE:
Make sure the coolant temperature sensor terminals do not get wet.
c. Place a thermometer "3" in the coolant.
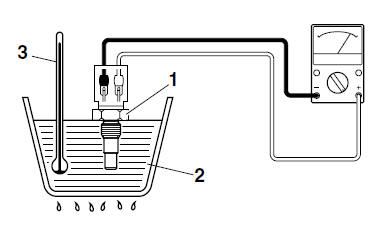
d. Slowly heat the coolant, and then let it cool down to the specified temperature.
e. Check the coolant temperature sensor resistance.
3. Install:
- Coolant temperature sensor

 Checking the radiator fan motor
1. Check:
Radiator fan motor
Faulty/rough movement → Replace.
a. Disconnect the radiator fan motor coupler
from the wire harness.
b. Connect the battery (DC 12 V) as shown.
Posi ...
 Checking the throttle body sensor assembly
WARNING
Do not remove the throttle body sensor assembly.
Handle the throttle body sensor assembly
with special care
Never subject the throttle body sensor assembly
to strong ...
Other materials:
Replacing the rear brake pads
NOTE:
When replacing the brake pads, it is not necessary
to disconnect the brake hose or disassemble
the brake caliper.
1. Remove:
Brake pads
Brake pad spring
NOTE:
To remove the inner brake pad "1", push down
on the brake caliper bracket so that there is
space to remove the brake pa ...
Adjusting the brake pedal free play
Adjusting the brake pedal free play
Brake pedal free play
The brake pedal free play should measure
3.5-4.5 mm (0.14-0.18 in) as
shown. Periodically check the brake
pedal free play and, if necessary, have
a Yamaha dealer adjust it.
WARNING
An incorrect brake pedal free play
in ...
Checking the rectifier/regulator
1. Check:
Rectifier/regulator output voltage
Out of specification → Replace the
rectifier/
regulator.
a. Set the engine tachometer to the spark plug
lead.
b. Connect the pocket tester (DC 20 V) to the
rectifier/regulator coupler as shown.
Positive tester probe
red "1"
Negat ...