Yamaha YZF-R125 Service Manual: Removing the generator
1. Remove:
- Generator rotor nut "1"
- Washer
NOTE:
- While holding the generator rotor "2" with the sheave holder "3", loosen the generator rotor nut.
- Do not allow the sheave holder to touch the
projection on the generator rotor.

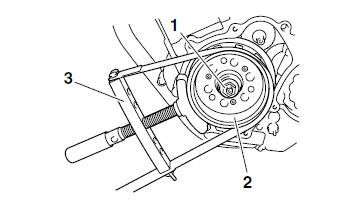
2. Remove:
- Generator rotor "1" (with the flywheel puller "2")
- Woodruff key
| CAUTION: To protect the end of the crankshaft, place an appropriate sized socket between the flywheel puller set center bolt and the crankshaft. |
NOTE:
Make sure the flywheel puller is centered over
the generator rotor.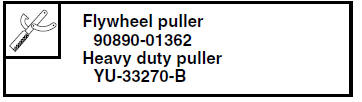


 Removing the starter clutch
1. Remove:
Starter clutch bolts "1"
NOTE:
While holding the generator rotor "2" with the
sheave holder "3", remove the starter clutch
bolts.
Do not allow the sheave holder to touch th ...
Other materials:
Disassembling the front fork legs
The following procedure applies to both of the
front fork legs.
1. Remove:
Rubber cap
Clip "1"
Front fork cap "2"
(with O-ring)
Fork spring
NOTE:
Push the front fork cap in the direction of the arrow
shown in the illustration to remove the clip.
2. Drain:
Fork oil
NOTE ...
Checking the starter motor
1. Check:
Commutator
Dirt Clean with 600 grit
sandpaper.
2. Measure:
Commutator diameter "a"
Out of specification Replace
the starter
motor.
3. Measure:
Mica undercut "a"
Out of specification Scrape
the mica to the
proper measurement with a hacksaw blade
...
Disassembling the front wheel
1. Remove:
Oil seal
Wheel bearings
a. Clean the surface of the front wheel hub.
b. Remove the oil seal "1" with a flat-head
screwdriver.
NOTE:
To prevent damaging the wheel, place a rag "2"
between the screwdriver and the wheel surface.
c. Remove the wheel bearings "3" with a ge ...