Yamaha YZF-R125 Service Manual: Checking the coolant temperature sensor
1. Remove:
- Coolant temperature sensor
WARNING
|
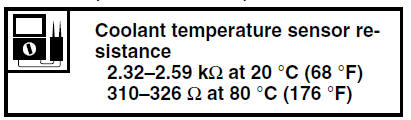
2. Check:
- Coolant temperature sensor resistance
Out of specification →Replace.
a. Connect the pocket tester (  ×
×
100) to the
coolant temperature sensor terminals as
shown.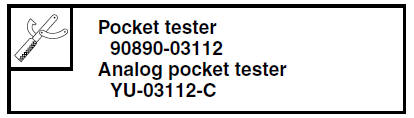
- b. Immerse the coolant temperature sensor "1" in a container filled with coolant "2".
NOTE:
Make sure the coolant temperature sensor terminals do not get wet.
c. Place a thermometer "3" in the coolant.
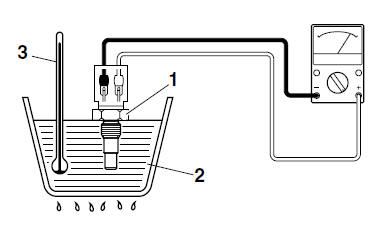
d. Slowly heat the coolant, and then let it cool down to the specified temperature.
e. Check the coolant temperature sensor resistance.
3. Install:
- Coolant temperature sensor

 Checking the radiator fan motor
1. Check:
Radiator fan motor
Faulty/rough movement → Replace.
a. Disconnect the radiator fan motor coupler
from the wire harness.
b. Connect the battery (DC 12 V) as shown.
Posi ...
 Checking the throttle body sensor assembly
WARNING
Do not remove the throttle body sensor assembly.
Handle the throttle body sensor assembly
with special care
Never subject the throttle body sensor assembly
to strong ...
Other materials:
Self-diagnostic function table
If the ECU detects an abnormal signal from a sensor while the vehicle is
being driven, the ECU illuminates
the engine trouble warning light and provides the engine with alternate
operating instructions that
are appropriate for the type of malfunction.
When an abnormal signal is received fro ...
Checking the piston pin
1. Check:
Piston pin
Blue discoloration/grooves
Replace the
piston pin and then check the lubrication system.
2. Measure:
Piston pin outside diameter "a"
Out of specification Replace
the piston pin.
3. Measure:
Piston pin bore diameter "b"
Out of specifica ...
Throttle position sensor
1. Check:
Throttle position sensor
a. Connect the digital circuit tester to the terminals
of the throttle body sensor assembly
coupler as shown.
Positive tester probe →
gray/red terminal "1"
Negative tester probe →
gray/black terminal "2"
b. Measure the throttle pos ...