Yamaha YZF-R125 Service Manual: Installing the rear wheel (disc)
1. Install:
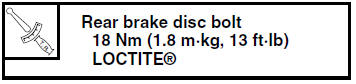
- Rear brake disc
NOTE:
Tighten the brake disc bolts in stages and in a crisscross pattern.

2. Check:
- Rear brake disc Refer to "CHECKING THE REAR BRAKE DISC" on page 4-33.
3. Lubricate:
- Rear wheel axle
- Contact surface of rear wheel hub and rear wheel
- Wheel bearings
- Oil seal lips

4. Adjust:
- Drive chain slack
Refer to "ADJUSTING THE DRIVE CHAIN
SLACK" on page 3-21.

 Adjusting the rear wheel static balance
NOTE:
After replacing the tire, wheel or both, the rear
wheel static balance should be adjusted.
Adjust the rear wheel static balance with the
brake disc and rear wheel drive hub installed.
...
 Front brake
...
Other materials:
Air induction system
1. Air induction system hose (air filter case to
reed valve assembly)
2. Air induction system reed valve assembly
3. Air induction system hose (reed valve
assembly to exhaust pipe)
Checking the air induction system
Air injection
The air induction system burns unburned exhaust
gases b ...
Cleaning the air filter element
NOTE:
There is a check hose "1" at the bottom of the air
filter case. If dust and/or water collects in this
hose, clean the air filter element and air filter
case.
1. Remove:
Rider seat
Refer to "GENERAL CHASSIS" on page 4-1.
2. Remove:
Fuel tank
Refer to "FUEL TANK" on page ...
Checking the fuel pressure
1. Check:
Pressure regulator operation
a. Remove the fuel hose connector cover "1"
and disconnect the fuel hose "2" from the fuel
pump.
CAUTION:Although the fuel has been removed from
the fuel tank, be careful when removing the
fuel hose, since there may be fuel remaining
i ...