Yamaha YZF-R125 Service Manual: Installing the front fork legs
The following procedure applies to both of the front fork legs.
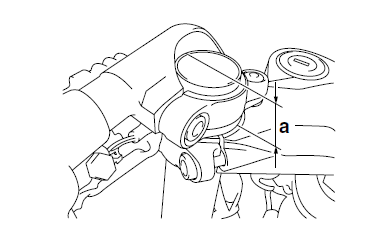
1. Install:
- Front fork leg Temporarily tighten the upper and lower bracket pinch bolts.
NOTE:
Make sure the inner tube end position "a" is 24.5 mm (0.96 in) from the top of the upper bracket.
2. Tighten:
- Lower bracket pinch bolt "1"

- Upper bracket pinch bolt "2"

- Handlebar bolt "3"

- Handlebar pinch bolt "4"

| WARNING Make sure the brake hose, clutch cable, and leads are routed properly. |

 Assembling the front fork legs
The following procedure applies to both of the
front fork legs.
WARNING
Make sure the oil levels in both front fork
legs are equal.
Uneven oil levels can result in poor handling
...
 Steering head
...
Other materials:
Installing the rear shock absorber assembly
1. Install:
Rear shock absorber assembly
Relay arm "1"
NOTE:
Install the relay arm as shown in the illustration.
2. Tighten:
Rear shock absorber assembly upper nut
Relay arm nut
Rear shock absorber assembly lower nut
3. Install:
Connecting arms
NOTE:
When ins ...
Checking the condition of the bulbs
The following procedure applies to all of the
bulbs.
1. Remove:
Bulb
WARNINGSince the headlight bulbs get extremely
hot,
keep flammable products and your hands
away from them until they have cooled
down.
CAUTION:
Be sure to hold the socket firmly when re ...
Sidestand
The sidestand is located on the left side
of the frame. Raise the sidestand or
lower it with your foot while holding the
vehicle upright.
TIP
The built-in sidestand switch is part of
the ignition circuit cut-off system, which
cuts the ignition in certain situations.
WARNING
The vehicl ...