Yamaha YZF-R125 Service Manual: Installing the camshaft and rocker arms
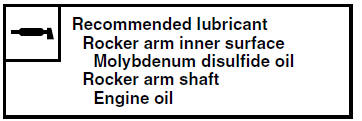
1. Lubricate:
- Rocker arms
- Rocker arm shafts
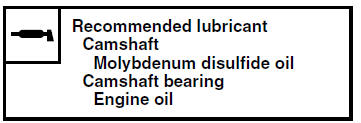
2. Lubricate:
- Camshaft
3. Install:
- Camshaft "1"
NOTE:
Make sure that the camshaft projections "a" and hole "b" are positioned as shown in the illustration.
4. Install:
- Rocker arms
- Rocker arm shafts "1"
NOTE:
- Make sure that the cutout "a" in each rocker arm shaft is facing downward as shown in the illustration.
- Make sure the rocker arm shafts (intake and exhaust) are completely pushed into the cylinder head.
 Checking the rocker arms and rocker arm shafts
The following procedure applies to all of the
rocker arms and rocker arm shafts.
1. Check:
Rocker arm
Damage/wear Replace.
2. Check:
Rocker arm shaft
Blue discoloration/excessive wea ...

Other materials:
Checking the shift shaft
1. Check:
Shift shaft
Bends/damage/wear Replace.
Shift shaft spring
Damage/wear Replace.
Checking the stopper lever
1. Check:
Stopper lever
Bends/damage Replace.
Roller turns roughly Replace
the stopper
lever.
Stopper lever spring
Damage/wear Replace.
...
Checking the throttle body joint and air filter case joint
1. Remove:
Right lower side cowling
Left lower side cowling
Refer to "GENERAL CHASSIS" on page 4-1.
2. Check:
Throttle body joint "1"
Air filter case joint "2"
Cracks/damage Replace.
3. Install:
Right lower side cowling
Left lower side cowling
Refer to "GENERAL CHAS ...
Starting the engine
In order for the ignition circuit cut-off
system to enable starting, one of the
following conditions must be met:
The transmission is in the neutral
position.
The transmission is in gear with
the clutch lever pulled and the sidestand
up.
1. Turn the key to "ON" and make
sure ...