Yamaha YZF-R125 Service Manual: Checking and lubricating the cables
The following procedure applies to all of the inner and outer cables.
| WARNING Damaged outer cable may cause the cable to corrode and interfere with its movement. Replace damaged outer cable and inner cables as soon as possible. |
1. Check:
- Outer cable
Damage
 Replace.
2. Check:
- Cable operation
Rough movement
 Lubricate.
NOTE:
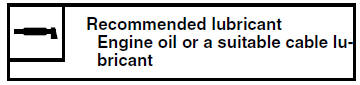
Hold the cable end upright and pour a few drops of lubricant into the cable sheath or use a suitable lubricating device.
Lubricating the clutch lever
Lubricate the pivoting point and metal-to-metal
moving parts of the lever.
Lubricating the brake lever
Lubricate the pivoting point and metal-to-metal
moving parts of the lever. 
Lubricating the pedals
Lubricate the pivoting point and metal-to-metal
moving parts of the pedals. 
Lubricating the sidestand
Lubricate the pivoting point and metal-to-metal
moving parts of the sidestand.
Lubricating the rear suspension
Lubricate the pivoting point and metal-to-metal
moving parts of the rear suspension.

 Checking the wheels
The following procedure applies to both of the
wheels.
1. Check:
Wheel
Damage/out-of-round → Replace.
WARNINGNever attempt to make any repairs to the
wheel.
NOTE:
After a t ...
 Electrical system
Checking and charging the battery
Refer to "ELECTRICAL COMPONENTS" on
page 8-57.
Checking the fuses
Refer to "ELECTRICAL COMPONENTS" on
page 8-57. ...
Other materials:
Checking the fuses
The following procedure applies to all of the fuses.
CAUTION:To avoid a short circuit, always turn the
main
switch to "OFF" when checking or replacing
a fuse.
1. Remove:
Rider seat
Refer to "GENERAL CHASSIS" on page 4-1.
2. Check:
Fuse
a. Connect the pocket te ...
Periodic maintenance and lubrication chart
NOTE:
The annual checks must be performed every year, except if a
kilometer-based maintenance,
or for the UK, a mileage-based maintenance, is performed instead.
From 30000 km (17500 mi), repeat the maintenance intervals starting
from 6000 km (3500 mi).
Items marked with an asterisk s ...
Checking the throttle body joint and air filter case joint
1. Remove:
Right lower side cowling
Left lower side cowling
Refer to "GENERAL CHASSIS" on page 4-1.
2. Check:
Throttle body joint "1"
Air filter case joint "2"
Cracks/damage Replace.
3. Install:
Right lower side cowling
Left lower side cowling
Refer to "GENERAL CHAS ...