
Yamaha YZF-R125 Service Manual: Circuit diagram
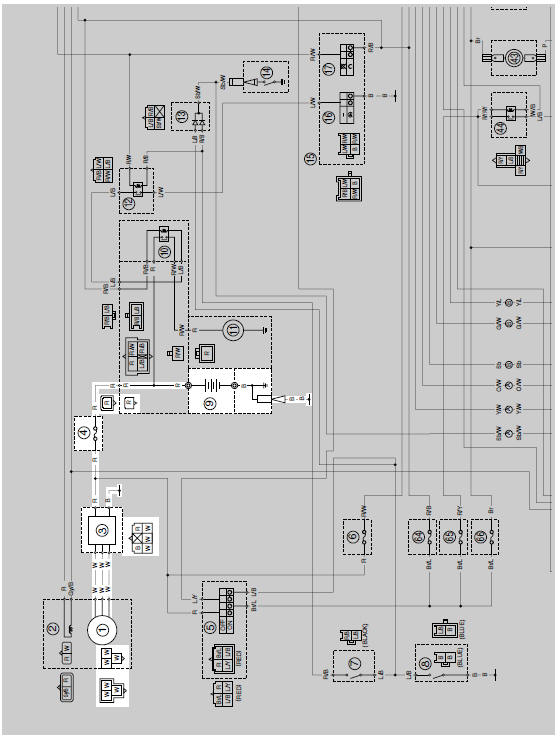
1. AC magneto
3. Rectifier/regulator
4. Main fuse
9. Battery
 Charging system
...
 Troubleshooting
The battery is not being charged.
NOTE:
Before troubleshooting, remove the following part(s):
1. Rider seat
2. Left side panel
3. Left lower side cowling
...
Other materials:
Installing the engine
1. Install:
Engine "1"
Engine mounting bolt (rear lower side) "2"
Engine mounting nut (rear lower side) "3"
Engine mounting bolt (rear upper side) "4"
Engine mounting nut (rear upper side) "5"
Engine mounting bolt (front side) "6"
Engine mounting nut (front side) "7"
NOTE:
Do not ...
Installing the front fork legs
The following procedure applies to both of the
front fork legs.
1. Install:
Front fork leg
Temporarily tighten the upper and lower
bracket pinch bolts.
NOTE:
Make sure the inner tube end position "a" is 24.5
mm (0.96 in) from the top of the upper bracket.
2. Tighten:
Lower br ...
Checking the steering
Worn or loose steering bearings may
cause danger. Therefore, the operation
of the steering must be checked as follows
at the intervals specified in the periodic
maintenance and lubrication
chart.
Place a stand under the engine to
raise the front wheel off the
ground. WARNING! To ...