Yamaha YZF-R125 Service Manual: Troubleshooting
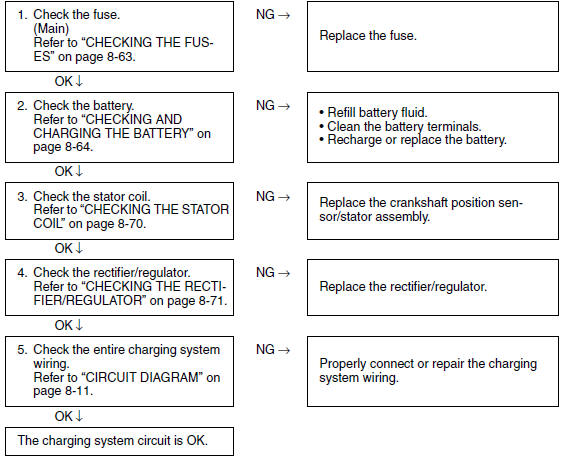
The battery is not being charged.
NOTE:
- Before troubleshooting, remove the following part(s):
1. Rider seat
2. Left side panel
3. Left lower side cowling
 Circuit diagram
1. AC magneto
3. Rectifier/regulator
4. Main fuse
9. Battery ...
 Lighting system
...
Other materials:
Installing the crankshaft
1. Install:
Crankshaft "1"
NOTE:
Install the crankshaft with the crankshaft installer
pot "2", crankshaft installer bolt "3", adapter
(M12) "4" and spacer (crankshaft installer) "5".
CAUTION:To avoid scratching the crankshaft and to
ease the installation procedure, lubricate ...
Separating the crankcase
1. Remove:
Crankcase bolts
NOTE:
Loosen each bolt 1/4 of a turn at a time, in stages
and in the proper sequence as shown.
A. Right crankcase
B. Left crankcase
2. Turn:
Shift drum segment
NOTE:
Turn the shift drum segment "1" to the position
shown in the illustration. In this ...
Checking and charging the battery
WARNINGBatteries generate explosive hydrogen gas
and contain electrolyte which is made of poisonous
and highly caustic sulfuric acid.
Therefore, always follow these preventive
measures:
Wear protective eye gear when handling or
working near batteries.
Charge batt ...