Yamaha YZF-R125 Service Manual: Installing the generator
1. Install:
- Woodruff key
- Generator rotor
- Washer
- Generator rotor nut
NOTE:
- Clean the tapered portion of the crankshaft and the generator rotor hub.
- When installing the generator rotor, make sure the woodruff key is properly sealed in the keyway of the crankshaft.
2. Tighten:
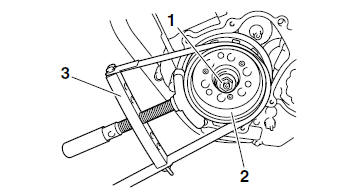
- Generator rotor nut "1"

NOTE:
- While holding the generator rotor "2" with the sheave holder "3", tighten the generator rotor nut.
- Do not allow the sheave holder to touch the
projection on the generator rotor.
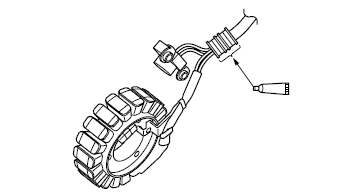
3. Apply:
- Sealant
(onto the crankshaft position sensor/stator
assembly lead grommet)
4. Install:
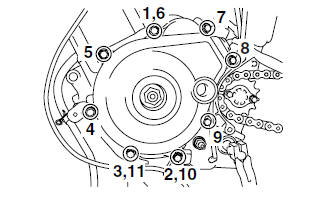
- Generator cover

NOTE:
Tighten the generator cover bolts in the proper tightening sequence as shown.
 Installing the starter clutch
1. Install:
Starter clutch assembly
Starter clutch bolts "1"
NOTE:
While holding the generator rotor "2" with the
sheave holder "3", tighten the starter clutch
bolts.
Do not allow t ...
 Electric starter
...
Other materials:
Checking the ignition spark gap
1. Check:
Ignition spark gap
Out of specification Perform the
ignition
system troubleshooting, starting with step 5.
Refer to "TROUBLESHOOTING" on page
8-3.
NOTE:
If the ignition spark gap is within specification,
the ignition system circuit is operating normally.
a. Disconnect the spa ...
Rear wheel
To remove the rear wheel
WARNING
To avoid injury, securely support the
vehicle so there is no danger of it
falling over.
Loosen the axle nut.
Axle nut
Drive chain slack adjusting bolt
Locknut
Brake caliper
Lift the rear wheel off the ground
according to the pr ...
Installing the front brake caliper
1. Install:
Brake caliper "1"
(temporarily)
Copper washers "2"
Brake hose "3"
Brake hose union bolt "4"
WARNINGProper brake hose routing is essential to
insure
safe vehicle operation. Refer to "CABLE
ROUTING" on page 2-33.
CAUTION:
Install the brake ...