Yamaha YZF-R125 Service Manual: Removing the front fork legs
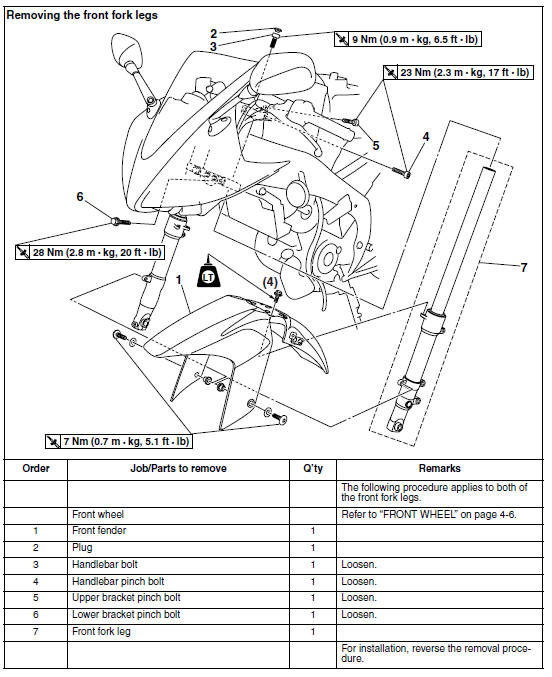

The following procedure applies to both of the front fork legs.
1. Stand the vehicle on a level surface.
| WARNING Securely support the vehicle so that there is no danger of it falling over. |
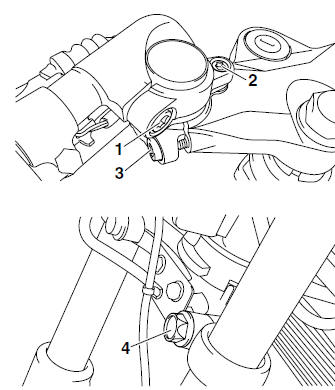
2. Loosen:
- Handlebar pinch bolt "1"
- Handlebar bolt "2"
- Upper bracket pinch bolt "3"
- Lower bracket pinch bolt "4"
| WARNING Before loosening the upper and lower bracket pinch bolts, support the front fork leg. |
3. Remove:
- Front fork leg
 Front fork
...
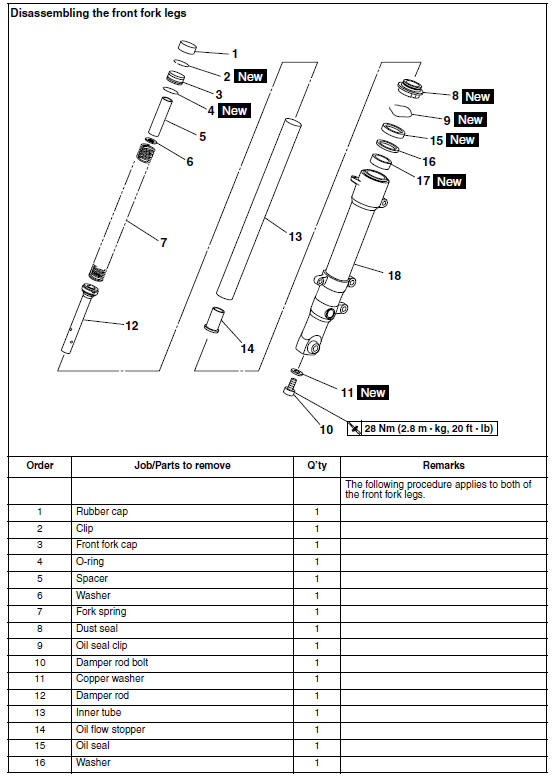
 Disassembling the front fork legs
The following procedure applies to both of the
front fork legs.
1. Remove:
Rubber cap
Clip "1"
Front fork cap "2"
(with O-ring)
Fork spring
NOTE:
Push the front fork cap in the direc ...
Other materials:
Battery
A poorly maintained battery will corrode
and discharge quickly. The electrolyte
level, battery lead connections and
breather hose routing should be
checked before each ride and at the intervals
specified in the periodic maintenance
and lubrication chart.
WARNING
Electrolyte is pois ...
Assembling the main axle and drive axle
1. Install:
Toothed washer "1"
Circlip "2"
NOTE:
Be sure to install the circlip so that its sharp
edge "a" is facing away from the toothed washer
and gear.
Be sure the circlip ends "b" are positioned at
the axle spline groove "c".
2. Install:
2nd pinion gear "1"
NO ...
Checking and lubricating the brake and clutch levers
Brake lever
Brake lever
Clutch lever
Clutch lever
The operation of the brake and clutch
levers should be checked before each
ride, and the lever pivots should be lubricated
if necessary.
Recommended lubricants:Brake lever:
Silicone grease
Clutch lever:
Lithium-soap ...