
Yamaha YZF-R125 Owners Manual: Identification numbers
Record the key identification number, vehicle identification number and model label information in the spaces provided below for assistance when ordering spare parts from a Yamaha dealer or for reference in case the vehicle is stolen.
KEY IDENTIFICATION NUMBER:
VEHICLE IDENTIFICATION NUMBER:
MODEL LABEL INFORMATION:
Key identification number
Key identification number
- Key identification number
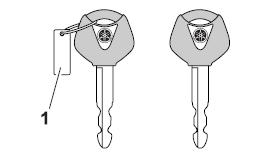
The key identification number is stamped into the key tag. Record this number in the space provided and use it for reference when ordering a new key.
Vehicle identification number
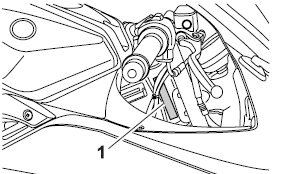
Vehicle identification number
- Vehicle identification number
The vehicle identification number is stamped into the steering head pipe. Record this number in the space provided.
TIP
The vehicle identification number is
used to identify your motorcycle and
may be used to register your motorcycle
with the licensing authority in your
area.
Model label
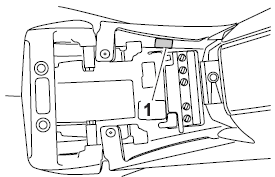
Model label
- Model label
The model label is affixed to the frame under the rider seat. Record the information on this label in the space provided. This information will be needed when ordering spare parts from a Yamaha dealer.


Other materials:
Removing the cylinder head
1. Align:
"I" mark "a" on the generator rotor
(with the stationary pointer "b" on the generator
cover)
a. Turn the crankshaft counterclockwise.
b. When the piston is at TDC on the compression
stroke, align the "I" mark "c" on the camshaft
sprocket with the mark "d" on the
cylinder h ...
Lubricating the drive chain
The drive chain consists of many interacting
parts. If the drive chain is not maintained properly,
it will wear out quickly. Therefore, the drive
chain should be serviced, especially when the
vehicle is used in dusty areas.
This vehicle has a drive chain with small rubber
O-rings between eac ...
Checking the shift shaft
1. Check:
Shift shaft
Bends/damage/wear Replace.
Shift shaft spring
Damage/wear Replace.
Checking the stopper lever
1. Check:
Stopper lever
Bends/damage Replace.
Roller turns roughly Replace
the stopper
lever.
Stopper lever spring
Damage/wear Replace.
...