Yamaha YZF-R125 Service Manual: Checking the tires
The following procedure applies to both of the tires.
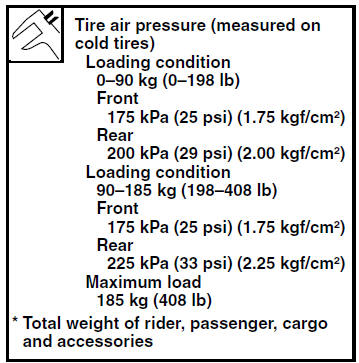
1. Check:
Tire pressure
Out of specification  Regulate.

WARNING
|
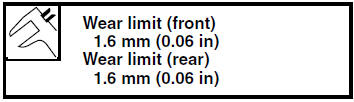
| WARNING It is dangerous to ride with a worn-out tire. When the tire tread reaches the wear limit, replace the tire immediately. |
2. Check:
Tire surfaces
Damage/wear  Replace the tire.
1. Tire tread depth
2. Side wall
3. Wear indicator
WARNING
|
A. Tire
B. Wheel
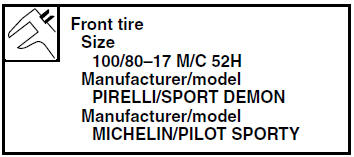
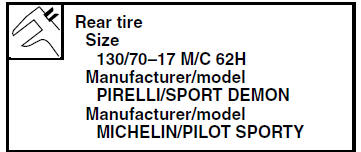
| WARNING After extensive tests, the tires listed below have been approved by MBK Industrie for this model. The front and rear tires should always be by the same manufacturer and of the same design. No guarantee concerning handling characteristics can be given if a tire combination other than one approved by MBK Industrie is used on this vehicle. |
| WARNING New tires have a relatively low grip on the road surface until they have been slightly worn. Therefore, approximately 100 km should be traveled at normal speed before any high-speed riding is done. |
NOTE:
For tires with a direction of rotation mark "1":
- Install the tire with the mark pointing in the direction of wheel rotation.
- Align the mark "2" with the valve installation point.
 Checking the front fork
1. Stand the vehicle on a level surface.
WARNINGSecurely support the vehicle so that there
is
no danger of it falling over.
2. Check:
Inner tube
Damage/scratches Replace.
...
 Checking the wheels
The following procedure applies to both of the
wheels.
1. Check:
Wheel
Damage/out-of-round → Replace.
WARNINGNever attempt to make any repairs to the
wheel.
NOTE:
After a t ...
Other materials:
Installing the relay arm
1. Lubricate:
Spacers
Bearings
Oil seals
Bolts (unthreaded shaft portion only)
2. Install:
Bearing "1"
(to the relay arm)
Oil seal "2"
(to the relay arm)
3. Rear shock absorber assembly
4. Relay arm
5. Connecting arm
A. Left side
B. Right side ...
Air induction system
1. Air induction system hose (air filter case to
reed valve assembly)
2. Air induction system reed valve assembly
3. Air induction system hose (reed valve
assembly to exhaust pipe)
Checking the air induction system
Air injection
The air induction system burns unburned exhaust
gases b ...
Checking the ignition coil
1. Check:
Primary coil resistance
Out of specification Replace.
a. Disconnect the ignition coil connectors from
the ignition coil terminals.
b. Connect the pocket tester ( × 1)
to the ignition
coil as shown.
Positive tester probe
red/white "1"
Negative tester probe
orange ...