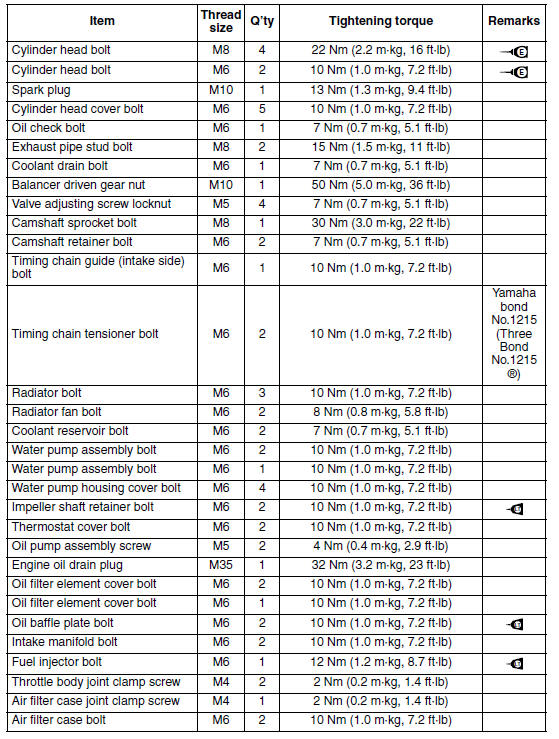
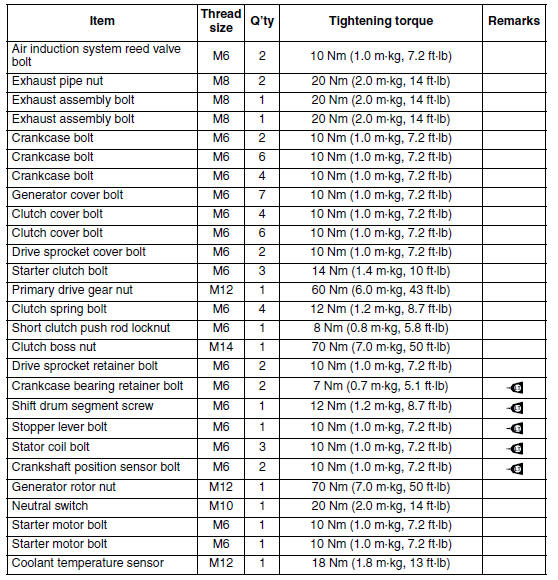
Yamaha YZF-R125 Service Manual: Engine tightening torques
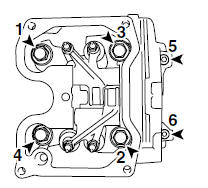
Cylinder head tightening sequence:
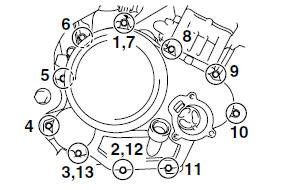
Generator cover tightening sequence:
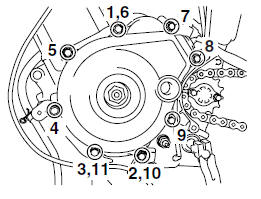
Clutch cover tightening sequence:
Crankcase tightening sequence:

A. Left crankcase
B. Right crankcase
 General tightening torque specifications
This chart specifies tightening torques for standard
fasteners with a standard ISO thread pitch.
Tightening torque specifications for special components
or assemblies are provided for each
chapt ...
 Chassis tightening torques
NOTE:
First, tighten the lower ring nut to approximately 48 Nm (4.8 m.kg,
35 ft.lb) with a torque wrench, then
loosen the lower ring nut completely.
Retighten the lower ring nut to ...
Other materials:
Catalytic converters
This vehicle is equipped with catalytic
converters in the exhaust system.
WARNING
The exhaust system is hot after operation.
To prevent a fire hazard or
burns:
Do not park the vehicle near
possible fire hazards such as
grass or other materials that
easily burn.
Park the vehic ...
Checking the steering
Worn or loose steering bearings may
cause danger. Therefore, the operation
of the steering must be checked as follows
at the intervals specified in the periodic
maintenance and lubrication
chart.
Place a stand under the engine to
raise the front wheel off the
ground. WARNING! To ...
Cleaning the air filter element
NOTE:
There is a check hose "1" at the bottom of the air
filter case. If dust and/or water collects in this
hose, clean the air filter element and air filter
case.
1. Remove:
Rider seat
Refer to "GENERAL CHASSIS" on page 4-1.
2. Remove:
Fuel tank
Refer to "FUEL TANK" on page ...