Yamaha YZF-R125 Owners Manual: Checking the front fork
The condition and operation of the front fork must be checked as follows at the intervals specified in the periodic maintenance and lubrication chart.
To check the condition
Check the inner tubes for scratches, damage and excessive oil leakage.
To check the operation
- Place the vehicle on a level surface and hold it in an upright position. WARNING! To avoid injury, securely support the vehicle so there is no danger of it falling over.
- While applying the front brake, push down hard on the handlebars several times to check if the front fork compresses and rebounds smoothly.
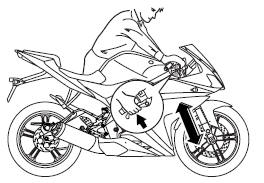
Checking the front fork
NOTICE
If any damage is found or the front
fork does not operate smoothly,
have a Yamaha dealer check or repair
it.
 Lubricating the swingarm pivots
The swingarm pivots must be lubricated
at the intervals specified in the periodic
maintenance and lubrication chart.
Recommended lubricant:Molybdenum disulfide grease
...
 Checking the steering
Worn or loose steering bearings may
cause danger. Therefore, the operation
of the steering must be checked as follows
at the intervals specified in the periodic
maintenance and lubrication
c ...
Other materials:
Changing the engine oil
1. Remove:
Right bottom cowling
Right upper side cowling
Right lower side cowling
Refer to "GENERAL CHASSIS" on page 4-1.
2. Start the engine, warm it up for several minutes,
and then turn it off.
3. Place a container under the engine oil drain
bolt.
4. Install:
Engine oil d ...
Starting failures
Engine
1. Cylinder and cylinder head
- Loose spark plug
- Loose cylinder head or cylinder
- Damaged cylinder head gasket
- Damaged cylinder gasket
- Worn or damaged cylinder
- Incorrect valve clearance
- Improperly sealed valve
- Incorrect valve-to-valve-seat contact
- Incorrect valve timi ...
Installing the shift forks and shift drum assembly
1. Install:
Shift fork-L "1"
Shift fork-C "2"
Shift fork-R "3"
Shift drum assembly "4"
Springs
Shift fork guide bar "5"
NOTE:
The embossed marks on the shift forks should
face towards the right side of the engine and be
in the following sequence: "R", "C", "L".
2. Check:
Tr ...