Yamaha YZF-R125 Service Manual: Replacing the front brake pads
NOTE:
When replacing the brake pads, it is not necessary to disconnect the brake hose or disassemble the brake caliper.
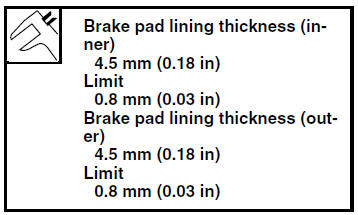
1. Measure:
- Brake pad wear limit "a"
Out of specification
 Replace
the brake pads as a set.
2. Install:
- Brake pad support

- Brake pad spring

- Brake pads

NOTE:
Always install new brake pads, a new brake pad spring and a new brake pad support as a set.
a. Connect a clear plastic hose "1" tightly to the bleed screw "2". Put the other end of the hose into an open container.
b. Loosen the bleed screw and push the brake caliper pistons into the brake caliper with your fingers.
c. Tighten the bleed screw. 
d. Install new brake pad support, a new brake pad spring and new brake pads.
NOTE:
The arrow mark "a" on the brake pad spring must point in the direction of disc rotation.
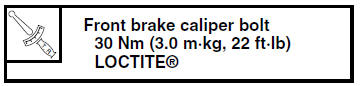
3. Install:
- Brake pad pin
- Brake pad clips
- Front brake caliper
4. Check:
- Brake fluid level
Below the minimum level mark "a" → Add
the
recommended brake fluid to the proper level.
Refer to "CHECKING THE BRAKE FLUID LEVEL" on page 3-18.

5. Check:
- Brake lever operation
Soft or spongy feeling
 Bleed
Bleed
the brake system.Refer to "BLEEDING THE HYDRAULIC BRAKE SYSTEM" on page 3-20.
 Checking the front brake disc
1. Remove:
Front wheel
Refer to "FRONT WHEEL" on page 4-6.
2. Check:
Brake disc
Damage/galling Replace.
3. Measure:
Brake disc deflection
Out of specification Correct the
b ...
 Removing the front brake caliper
NOTE:
Before disassembling the brake caliper, drain
the brake fluid from the entire brake system.
1. Remove:
Brake hose union bolt "1"
Copper washers "2"
Brake hose "3"
NOTE:
Put the en ...
Other materials:
Incorrect engine idling speed
Engine
1. Cylinder and cylinder head
Incorrect valve clearance
Damaged valve train components
2. Air filter
Clogged air filter element
Fuel system
1. Throttle body
Damaged or loose throttle body joint
Improperly adjusted engine idling speed (idle
adjusting screw)
Improper ...
Checking the transmission
1. Measure:
Main axle runout
(with a centering device and dial gauge "1")
Out of specification Replace
the main axle.
2. Measure:
Drive axle runout
(with a centering device and dial gauge "1")
Out of specification Replace
the drive axle.
3. Check:
Transmiss ...
Checking the starter motor
1. Check:
Commutator
Dirt Clean with 600 grit
sandpaper.
2. Measure:
Commutator diameter "a"
Out of specification Replace
the starter
motor.
3. Measure:
Mica undercut "a"
Out of specification Scrape
the mica to the
proper measurement with a hacksaw blade
...