
Yamaha YZF-R125 Service Manual: Removing the starter clutch
1. Remove:
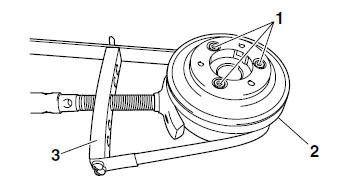
- Starter clutch bolts "1"
NOTE:
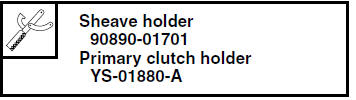
- While holding the generator rotor "2" with the sheave holder "3", remove the starter clutch bolts.
- Do not allow the sheave holder to touch the
projection on the generator rotor.
 Removing the generator
1. Remove:
Generator rotor nut "1"
Washer
NOTE:
While holding the generator rotor "2" with the
sheave holder "3", loosen the generator rotor
nut.
Do not allow the sheave holder to t ...
 Checking the starter clutch
1. Check:
Starter clutch rollers "1"
Starter clutch spring caps "2"
Starter clutch springs "3"
Damage/wear Replace the starter
clutch
assembly.
2. Check:
Starter clutch idle ge ...
Other materials:
Cleaning the air filter element
NOTE:
There is a check hose "1" at the bottom of the air
filter case. If dust and/or water collects in this
hose, clean the air filter element and air filter
case.
1. Remove:
Rider seat
Refer to "GENERAL CHASSIS" on page 4-1.
2. Remove:
Fuel tank
Refer to "FUEL TANK" on page ...
Care
While the open design of a motorcycle
reveals the attractiveness of the technology,
it also makes it more vulnerable.
Rust and corrosion can develop
even if high-quality components are
used. A rusty exhaust pipe may go unnoticed
on a car, however, it detracts
from the overall appearanc ...
Genuine Yamaha Accessories
Choosing accessories for your vehicle
is an important decision. Genuine
Yamaha accessories, which are available
only from a Yamaha dealer, have
been designed, tested, and approved
by Yamaha for use on your vehicle.
Many companies with no connection to
Yamaha manufacture parts and access ...