
Yamaha YZF-R125 Service Manual: Handlebars
 Installing the rear brake master cylinder
1. Install:
Copper washers "1"
Brake hose "2"
Rear brake light switch "3"
WARNINGProper brake hose routing is essential to
insure
safe vehicle operation. Refer to "CABLE
...
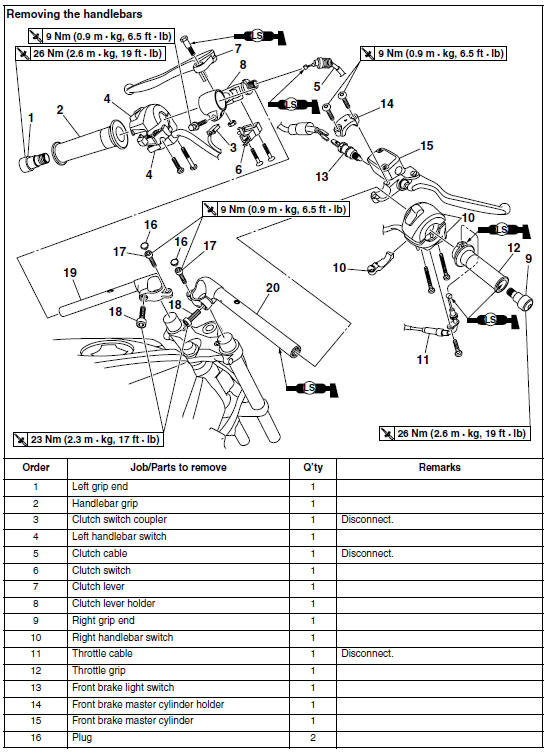
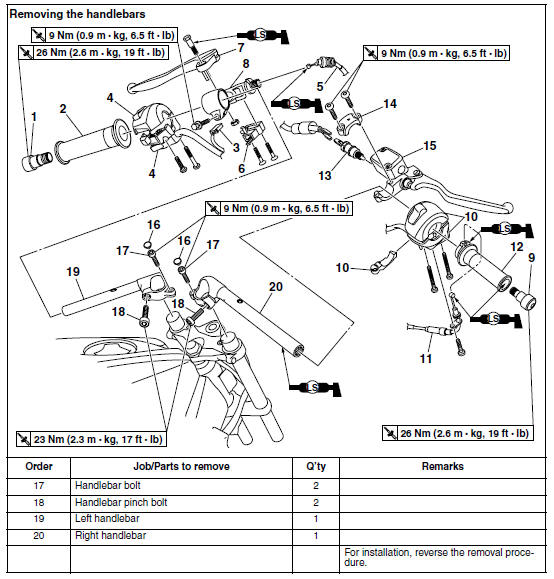
 Removing the handlebars
1. Stand the vehicle on a level surface.
WARNINGSecurely support the vehicle so that there
is
no danger of it falling over.
2. Remove:
Handlebar grip "1"
NOTE:
Blow compre ...
Other materials:
Removing the crankshaft
1. Remove:
Crankshaft "1"
NOTE:
Remove the crankshaft with the crankcase
separating tool "2".
Make sure the crankcase separating tool is
centered over the crankshaft.
CAUTION:
To protect the end of the crankshaft, place
an appropriate sized socket between the
c ...
Checking the piston pin
1. Check:
Piston pin
Blue discoloration/grooves
Replace the
piston pin and then check the lubrication system.
2. Measure:
Piston pin outside diameter "a"
Out of specification Replace
the piston pin.
3. Measure:
Piston pin bore diameter "b"
Out of specifica ...
Installing the cylinder head
1. Install:
Cylinder head
NOTE:
Pass the timing chain through the timing chain
cavity.
2. Tighten:
Cylinder head bolts "1"
Cylinder head bolts "2"
NOTE:
Lubricate the cylinder head bolts and washers
with engine oil.
Tighten the cylinder head bolts in the proper
tighten ...