Yamaha YZF-R125 Service Manual: Adjusting the rear disc brake
1. Check:
- Brake pedal position
(distance "a" from the center of the rider footrest
to the center of the brake pedal)
Out of specification
 Adjust.

2. Adjust:
- Brake pedal position
a. Loosen the locknut "1".
b. Remove the cotter pin "2", washer "3", and pin "4".
c. Turn the adjusting nut "5" in direction "a" or "b"
until the specified brake pedal position is obtained.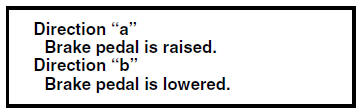
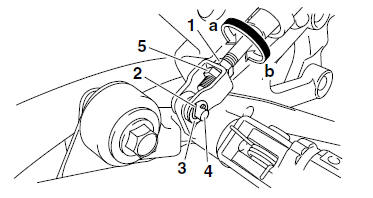
d. Tighten the locknut "1" to specification.
| WARNING A soft or spongy feeling in the brake pedal can indicate the presence of air in the brake system. Before the vehicle is operated, the air must be removed by bleeding the brake system. Air in the brake system will considerably reduce braking performance. |
| CAUTION: After adjusting the brake pedal position, make sure there is no brake drag. |
e. Install the pin, washer, and cotter pin.
| WARNING Always use a new cotter pin. |
 Chassis
...
 Checking the brake fluid level
1. Stand the vehicle on a level surface.
NOTE:
Place the vehicle on a suitable stand.
Make sure the vehicle is upright.
2. Check:
Brake fluid level
Below the minimum level mark "a" → ...
Other materials:
Checking the turn signal relay
1. Check:
Turn signal relay input voltage
Out of specification →The wiring circuit
from
the main switch to the turn signal relay coupler
is faulty and must be repaired.
a. Connect the pocket tester (DC 20 V) to the
turn signal relay terminal as shown.
- Positive tester probe
b ...
Installing the rear shock absorber assembly
1. Install:
Rear shock absorber assembly
Relay arm "1"
NOTE:
Install the relay arm as shown in the illustration.
2. Tighten:
Rear shock absorber assembly upper nut
Relay arm nut
Rear shock absorber assembly lower nut
3. Install:
Connecting arms
NOTE:
When ins ...
Installing the rear wheel (disc)
1. Install:
Rear brake disc
NOTE:
Tighten the brake disc bolts in stages and in a
crisscross pattern.
2. Check:
Rear brake disc
Refer to "CHECKING THE REAR BRAKE
DISC" on page 4-33.
3. Lubricate:
Rear wheel axle
Contact surface of rear wheel hub and rear
wheel
Whee ...