Yamaha YZF-R125 Owners Manual: Handlebar switches
Left

Left
1. Pass switch "PASS"
2. Dimmer switch " /
/ "
"
3. Turn signal switch " /
/ "
"
4. Horn switch" "
"
Right
Right
- Engine stop switch "
 /
/ "
" - Start switch"
 "
"
Pass switch "PASS"
Press this switch to flash the headlight.
Dimmer switch "/"
Set this switch to""
for the high
beam and to""
for the low beam.
Turn signal switch "
/"
To signal a right-hand turn, push this
switch to"".
To signal a left-hand
turn, push this switch to"".
When released,
the switch returns to the center
position. To cancel the turn signal
lights, push the switch in after it has returned
to the center position.
Horn switch"
"
Press this switch to sound the horn.
Engine stop switch "/"
Set this switch to"
"
before starting
the engine. Set this switch to"
"
to
stop the engine in case of an emergency,
such as when the vehicle overturns
or when the throttle cable is stuck.
Start switch"
"
Push this switch to crank the engine with the starter. See page 5-1 for starting instructions prior to starting the engine.
 Multi-function display
Multi-function display
Multi-function display
"RESET/SELECT" button
WARNING
Be sure to stop the vehicle before
making any setting changes to the
multi-function display. Changing
s ...
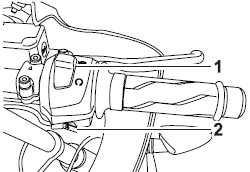
 Clutch lever
Clutch lever
Clutch lever
The clutch lever is located at the left
handlebar grip. To disengage the
clutch, pull the lever toward the handlebar
grip. To engage the clutch, release
th ...
Other materials:
Fuel
Make sure there is sufficient gasoline in
the tank.
WARNING
Gasoline and gasoline vapors are
extremely flammable. To avoid fires
and explosions and to reduce the
risk of injury when refueling, follow
these instructions.
Before refueling, turn off the engine
and be sure that no on ...
Checking the camshaft sprocket and timing chain guide
1. Check:
Camshaft sprocket
More than 1/4 tooth wear "a" Replace
the
camshaft sprocket, timing chain and crankshaft
as a set.
a. 1/4 tooth
b. Correct
1. Timing chain roller
2. Camshaft sprocket
2. Check:
Timing chain guide (exhaust side)
Damage/wear Replace.
...
Lubricating the drive chain
The drive chain consists of many interacting
parts. If the drive chain is not maintained properly,
it will wear out quickly. Therefore, the drive
chain should be serviced, especially when the
vehicle is used in dusty areas.
This vehicle has a drive chain with small rubber
O-rings between eac ...