Yamaha YZF-R125 Service Manual: Checking the piston pin
1. Check:
- Piston pin
Blue discoloration/grooves

Replace the piston pin and then check the lubrication system.
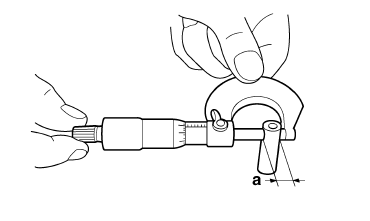
2. Measure:
- Piston pin outside diameter "a"
Out of specification
 Replace
the piston pin.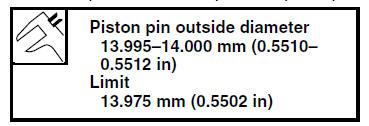
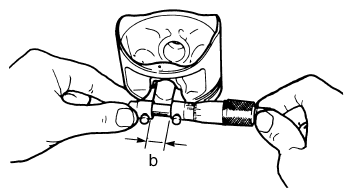
3. Measure:
- Piston pin bore diameter "b"
Out of specification
 Replace
the piston.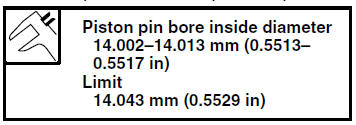
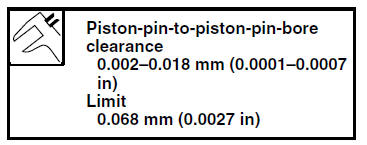
4. Calculate:
Piston-pin-to-piston-pin-bore clearance
Out of specification  Replace the
piston pin
and piston as a set.
- Piston-pin-to-piston-pin-bore clearance =
Piston pin bore diameter "b" -
Piston pin outside diameter "a"
 Checking the piston rings
1. Measure:
Piston ring side clearance
Out of specification Replace the
piston
and piston rings as a set.
NOTE:
Before measuring the piston ring side clearance,
eliminate any carbon deposits ...
 Installing the piston and cylinder
1. Install:
Top ring "1"
2nd ring "2"
Oil ring expander "3"
Lower oil ring rail "4"
Upper oil ring rail "5"
NOTE:
Be sure to install the piston rings so that the
manufacturer marks or ...
Other materials:
Intake air pressure sensor
1. Check:
Intake air pressure sensor output voltage
Out of specification Replace the throttle
body.
a. Connect the pocket tester (DC 20 V) to the
throttle body sensor assembly coupler as
shown.
Positive tester probe
pink/white "1"
Negative tester probe
gray/black "2"
...
Installing the rear shock absorber assembly
1. Install:
Rear shock absorber assembly
Relay arm "1"
NOTE:
Install the relay arm as shown in the illustration.
2. Tighten:
Rear shock absorber assembly upper nut
Relay arm nut
Rear shock absorber assembly lower nut
3. Install:
Connecting arms
NOTE:
When ins ...
Measuring the compression pressure
NOTE:
Insufficient compression pressure will result in a
loss of performance.
1. Measure:
Valve clearance
Out of specification →Adjust.
Refer to "ADJUSTING THE VALVE CLEARANCE"
on page 3-3.
2. Start the engine, warm it up for several minutes,
and then turn it off.
3. Remove:
...